Thursday, December 27, 2012

Pony bead ornaments

Sloan and I were trying to figure out what we could do with all the beads we had in our craft drawer.  Instead of stringing a necklace all the way to China, we decided to try making ornaments or suncatchers. I think we will try our heart cookie cutters with pink, clear and red beads for Valentine's Day!


  For the project you will need:
Pony bead ( clear and colored )
regular muffin tin
drill and bit
ribbon
oven
crack a few windows :) Or not, I didn't think it gave off fumes at all but use your best judgement


Step 1 - Preheat your oven to 400 degrees,  take the beads and sprinkle them into the muffin tin to cover the bottom of each compartment.  You can make patterns or sprinkle them random, have fun with it.

 
Step 2- Place in the 400 degree oven for 25-30 minutes.  Check on the beads once and awhile to ensure they are melting and when to take them out of the oven.
 
 
See the melted beads? Pretty!
 
Step 3- Let these babies cool off. I cheated and set mine outside to harden faster.  Once hardened just turn the pan upside down and tap them out.  You will have perfect little circles! I took my drill and put a hole at the top to string ribbon through :)
I tied some onto Christmas gifts and put some with tiny suction cups to have as suncatchers
 
Enjoy!


Monday, December 3, 2012

Mini Cupcake pan Advent Calendar

I wanted an advent calendar that wasn't chocolate with Avary's Galactosemia it just isn't an option. The chocolate ones are cute but lacked the meaning I was trying to get across too (Jesus is the reason for the season, not presents)
 I wanted to be able to create my own and personalize it to our family.  I looked at my mini muffin tin and realized it was 24 compartments.  I have seen people on Pinterest try to use 2 regular muffin pans but who wants huge pans hanging on your wall? And trying to join them together?  Not this gal :) No thanks!

 Supplies you will need

24 count mini muffin pan
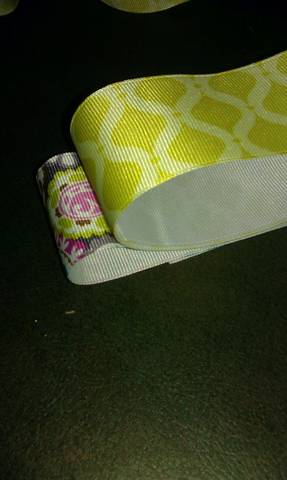
ribbon ( to tie on top to hang)
Drill ( to add another hole on the top to hang ribbon from)
Drill bit
Adhesive magnet roll ( got mine at HL for $3.50 with half off coupon)
Computer and printer ( to make the 1-24 numbers and print them out)
Card stock ( to print numbers on)
circle punch ( mine is 2 inches)
Word on computer ( to create tags that go inside of tins and the numbers)
Command hooks ( optional )

A lot of supplies I already had on hand so this project cost me little to nothing to create.  If you do need to buy these things they are all something you would definitely use again :)

Take your Word program and make your 1-24 numbers.  If you don't have Word go online and search for numbers pictures and you will come up with a TON of free printables I am sure.

 Print out the numbers on card stock

Take the self adhesive magnet paper and peel off the backing.  Stick the numbers card stock on top of the adhesive side so the magnet will be on the back of the number once it is done

Take your circle punch and punch out all of your numbers

Take the Word program again and make 24 things to do for every compartment.  I made a lot of biblical ones to show the true meaning of Christmas.  Feel free to experiment and add candy, small treats etc in the compartments.  Use your imagination :)

Print out the list of the 24 things to do and cut them out

Fold all of the ideas and place each one inside the tin and cover with the 1-24 magnets

Drill your second hole at the top of the pan and loop the ribbon and tie a knot at each end to hang the advent calendar

Viola!  You have a calendar to use every year!  You can save your ideas for each compartment or do new ones each year

I organized my print outs in the order I wanted to do them.  ( I didn't want to camp out under the Christmas tree on a school night) LOL

Have fun!  Merry CHRISTMAS!


 Some examples of the print outs for the compartments,  I had read Luke 2 along with various christian related activities also.  Feel free to do one that suits your family :)
 The calendar with the paper's inside.  Sorry for the glare, the pan is of course shiny!

The calendar hanging on the wall. I use the 3m hooks that are removeable.  They ROCK!  I also let the girls take turns pulling off the magnet every day.

Wednesday, November 28, 2012

Fa, la, la,la, la, la, la, la, la!!! Mercury glass Vases

Since we've moved back to Iowa, I must say Hobby Lobby or HL as I refer to it,  has called my name.  I just love this store and all the goodies it has to offer.  I also have great luck with all of the sales they seem to have in their ads every week. 
As I strolled through the aisles one day after dropping doodle bug off at preschool, I noticed in the spray paint aisle a spray that had a shiny mirror colored lid.  I picked it up and I instantly knew what the Goodwill vases were going to be used for!  Mercury glass mantle decorations for Christmas!  I grabbed my 50% off coupon ( this stuff was expensive) and headed to the register with Mr.Man. 

Here's how you can turn ordinary glass into a mirror like finish :)

Krylon spray paint in Looking Glass ($11.99 at HL) I used my half off coupon
Assorted vases in different sizes and shapes ( $6 for 5 vases) I used only 3 in this project
newspaper
well ventilated area or go outside (this project smells!)
a pokey thingy ( this is a very technical term I know)  you need something to stick inside the vase to blot the paint once you spray it inside the vessel
Stuff to put inside your vases once they are done, or you can leave them empty

Start by shaking the crap out of the spray paint.  I did for 2 minutes like the instructions say, and you will want to do this every time you use the paint.  I sprayed 1 light coat into each jar and blotted with the newspaper.  I did this about 5 or 6 times making sure each coat was completely dried.  I did not spray the outside, just the inside. I still have a lot left in the can as a little bit goes a long way.

 It turned out beautiful. 

Enjoy!


Tuesday, November 27, 2012

Snowy Peppermint Play Dough

Sloan and Avary LOVE play dough, and I mean LOVE...
  I got so tired of the play dough plastic containers that were hard to open and close for their little hands that I decided to make our own.  I wanted something wintery ( is that a real word)??
 I came up with the recipe I always use and just added peppermint extract and some glitter. (It's hard to capture the glitter with the camera)
 
1 Cup Flour
1/2 cup salt
2 tbsp oil
2 tsp cream of tartar
1 cup water
food coloring ( or keep it original)

Heat the oil in a pot. Remove from the heat and add food coloring and water.( I do this so the food coloring mixes evenly)  Stir in all other ingredients. Continue to cook over low heat until mixture is firm, about 4-5 minutes. Remove from heat, and set clay mixture on wax paper to cool.
Store in an airtight container

We made blue, pink and the original was a creamy white.  I tell ya what...  It smells up the whole kitchen when the girls play with it, and I love the little twinkle of glitter :)  Enjoy!

Wednesday, October 10, 2012

Halloween bleach stencil shirt

So I was looking for shirts for the girls for Halloween that were free of peace signs, tacky logos and silly sayings so I searched online for some ideas on making our own.  Usually I would have no problem with sewing on an applique and calling it good, but I wanted something "different".  I came up with this.  Feel free to experiment and have fun.

Supplies you will need
* black shirts ( $1.97 clearance at Walmart)
* empty spray bottle ( $1.00 at Dollar Tree)
* freezer paper, it comes in a roll like wax paper ( grocery store $2.99)
* bleach
* cardboard scraps
* marker, to draw design onto freezer paper
* iron
* scissors

Total project cost minus the supplies I already had $8.40 for two shirts! Sweet deal...

The first step is to trace out your design on the freezer paper with a marker.  You can trace the design also off of a coloring book, etc. I just free handed mine.  Avary wanted a ghost, and Sloan wanted a jack o' lantern.  Hudson had the short end of the stick on this one since I didn't have a black onesie :) yet...

 I cut the "stencils" out and then ironed them onto the shirt.  I used the cotton setting and make sure you trace on the paper side not the shiny side of the freezer paper.

After you iron the stencil on put the scrap cardboard onto the inside of the shirt so your spray wont bleed through to the other side of the shirt.  Take the shirts outside and they will be ready for your bleach spray. I mixed 3 parts water to 1 part bleach in the spray bottle. I made sure the spray was set on spray and not stream.  The girls loved to spray their own shirts.  I made sure they got the ghost eyes and mouth sprayed well and the jack o' lanterns also. 
Then they watched in amazement as the bleach solution turned the black to orange!!
 So cool! It takes just seconds.
 
Trust me, this is not like watching paint dry. Haha! Once the spray has dried (I waited 30 minutes) slowly peel the stencil of freezer paper away from the shirt.  And your design is revealed!
Finished product, it so so fun and easy and CHEAP!  So pretty!
 Happy Halloween!!

Tuesday, October 2, 2012

4x4 pumpkins

I saw this on Pinterest and I thought it looked super cute. I modified it to meet my "needs" so here is my version.

Supplies needed
10 foot 4x4 ( Home Depot $9.49) cut into six different sizes, which they will do for you
1x1 square dowel ( Home Depot scrap section $.51)
electric sander (  if you don't have one you could do it by hand)
sand paper for sander
finishing nails
hammer
leather gloves
1 can orange spray paint ( Home Depot $3.49) I chose satin for both colors
1 can brown spray paint ( Home Depot $3.49)
1 spool of purple ribbon ( Hobby Lobby $1.49) each
1 spool of green ribbon
1 spool of jute ribbon or burlap
several sizes of chisels
 Total cost of project ..da, da, da, da...... less than $23.00!!!!

First at Home Depot I had the lumber dude cut my 10 ft 4x4 into 6 pieces ( I told him to wing it and he said I was his easiest job he had all day) 
I also had him cut the dowel into six pieces as well

This is what your lumber will look like
 
Next you want to knock off the squared edges off the 4x4 to make them more "rounded".  I used the chisel and set the 4x4 upright and wore gloves and used the hammer to pound in the chisel to "round off the corners". Do this on just the 4x4 I left the 1x1 squared off . 
 Next step is laying all of the pieces of wood upright on cardboard and spray paint them. The 4x4's spray orange and the 1x1 spray brown.  Let them dry in between coats.
 
Then watch in amazement as your neighbors walk by to ask what "project" are you working on now? :)  haha...  Careful with the spray paint too. I worked on this when we had absolutely no wind.  You don't want this to "drift" and cause over spray on cars... I mean things...
After your wood has dried, sand them all and distress them with the sander.  I took extra sanding to the corners and edges to take on the details. The 4x4's are rough lumber so you will need to sand them well.  Sand the 1x1's as well to distress them too.

After sanding I took the finishing nail and pounded it half way into the middle of the 4x4 to make a hole.  I removed the nail and put the head of the nail into the hole it left, leaving the point exposed in the middle of the 4x4.  I then took the 1x1 brown stem and pounded it into the 4x4 so the stem was affixed by the nail.  I did this to all 6 pumpkins.  Grouped them by 3 and tied them off with jute ribbon.  I also took an extra detail and put the green and purple ribbon onto the 1x1 "stem" making them look a little more festive for Halloween.  I will do the same after Halloween for a more universal fall look . 
I hope the last few steps make sense.  I forgot to snap some more pictures.  Comment me below if you need help with anything :)

Here is the final product, this does make 2 sets of 3, but my Mom holds a special place in my heart so she got one... Yes, she is spoiled :) She deserves every bit though... Enjoy and Happy Halloween Decorating!!! - Kadi


Wednesday, September 19, 2012

Kids art wall

So, I love putting up the art and worksheets the girls do but I found myself a little stuck when our new fridge is stainless steel and doesn't hold a magnet :(  ( It sure holds fingerprints though).... I needed something to cover our big wall in our dining room and wanted the art to be switched out easily.  I looked on Pinterest and found an idea that took frames and a binder clip and viola!  You are instantly set up with a wall of art :) I tweaked mine to fit our style and it turned out super cool .  Now I can display the girls projects as part of our decor :)

Here's what you will need
*Spray paint of your choice ( I chose Krylon in Matte Black) $3.47 at Walmart
*Old frames all different sizes ( I used old, you could use new but I am a upcycle gal) Goodwill $15 for 5 frames!
*needle nose pliers & butter knife ( to remove staples from frame and take out glass)
*gloves ( to protect your hands from being cut by the glass)
*old cardboard ( to lay out frames for spray painting)
*binder clips ( to hang off nail inside the frame to switch out artwork) $1.49 package of 10 at Walmart
*nails ( to hang frames on the wall)
total cost of project - $19.96 - What a SWEET price! And that's less than one new 8x10 frame!

First you need to take your glass and picture out of the frame. I had to remove staples and matting and backing, etc on the Goodwill ones I purchased. Be careful!  I would wear gloves to protect yourself from getting cut. 
                                                                            Before
                                                                           
 
After
I got some frames with great detail
 
 
I put the empty frames out on the cardboard, set aside the glass for another project or toss.  I sprayed the frames lightly with one coat of spray paint, I let them dry for 10 minutes and went back for another coat.
 
After the 2 coats of paint
I really like the Matte finish. It turned out super classy,( just like me) haha!
I hung them on the wall in no particular order. I also added a letter M that I already had to finish it off. I don't have the binder clips up yet but you would just put a nail where you want the binder clip to hang the art inside the frame.
 
Another project down, a million more to go!  Happy Crafting! 


Thursday, September 13, 2012

Fall Wreath

I fell in love with white pumpkins for fall decor and I needed to make a wreath to reflect that love :) Okay, if you know me... You know,I LOVE a wreath! 

Here is the supplies you need =

Grapevine wreath (got mine at Hobby Lobby for $2.50) I used 40% off coupon
beaded wire ribbon ( free from another project)
2 spools of ribbon ( Hobby Lobby sale $4.00 for both)
6 foam white/buttercream color on a pick ( Hobby Lobby $1.50 each on sale)
6 brown pipecleaners ( $.97 at Hobby Lobby for a package of 25)
total cost = $16.47, now that's what I love!  These similar wreaths sell for $60.00 on up at stores

I used a beaded wire to weave into my wreath. You can use whatever decor you want, this is just an idea. Then you want to take your grapevine wreath and place your pumpkins on the wreath like a clock. One at 12, one at 2, one at 4, one at 6, one at 8, and one at 10. This will give you equal placement space between pumpkins.  I used ones that had picks that bent so I just weaved them through the back of the wreath.  No hot glue on this project :) YES!
The next step is to make the ribbons to put next to your pumpkins. I layed two on top of each other alternating between what color I put on top. I cut maybe 6 inches for the top color and 8 for the bottom color. I looped the two ribbons and stacked them on top of each other. I folded them in half and took a brown pipecleaner and pulled it as tight as possible and twisted the back. I took the finished loop ribbon and stuck both ends of the pipe cleaner through the wreath and weaved the extra pipecleaner into the back of the wreath. I placed the looped ribbons along side of each of the 6 pumpkins. 
 
 
It turned out so pretty. I love the colors I used for the ribbon. It has mustard yellows, and greens and purples and all the rich colors you see in the fall. I then took some remaining ribbon to do a loop to hang it from the front door.  I cheat and I don't use a wreath hanger for the door, I just take my end of the ribbon and tack it to the top of the door so there is nothing showing but the elegant ribbon. I hope you enjoyed this tutorial and I can't wait to hang this on the door for the fall season :)


Wednesday, September 12, 2012

Happy Fall!

Yep, I doubt I can call myself a "true blogger" as my last post was February!  Haha... Oh well, I try.  The McVay family has been through a whirlwind of change the last few months.  Aaron accepted an OnBase job at the begining of April that is based out of WI so we thought we were moving there but it turned out they had an office in Urbandale, IA so guess where we headed?? Yep!  We are now Iowans again!  Hooray! After a couple of straining months of craziness we are in Clive and loving it here.  Avary just started 2nd Grade and Sloan is in a pre-k program three days a week and they are both doing great.  Hudson just celebrated his very 1st Birthday and we were incredibly blessed to have shared it with great family and friends that we have missed terribly.  Hopefully I will be able to post more now that we are settled in.     Happy FALL!

Thursday, February 2, 2012

Chocolate Playdough

I am always looking for projects that our kids and I can do together.  I love the way a hands on actitivity can spark their little imaginations.  Here are the directions and receipe for Chocolate Playdough.... Play with it, don't eat it :) This is way cool ( in the words of Avary)....


INGREDIENTS:

1 1/4 cup flour
1/2 cup cocoa powder
1/2 cup salt
1/2 tablespoon cream of tartar
1 1/2 tablespoon cooking oil
1 cup boiling water


PREPARATION:

Stir ingredients together and mix well. Cook over low heat until dough forms a ball. When cool, mix with your hands.

Store in airtight container. It will smell good enough to eat but without sugar in it kids will not want to taste it a second time!

These are a few of our favorite things...

Aaron's birthday was January 11th, and I was trying to come up with something that was both meaningful and not just another "thing" for us to add to our stuff. I came up with this with a little help from another crafting blog, which now I can't seem to find.  So if this was your original idea, take credit where credit is due.  Here is my version. 

Supplies you will need:
frame with mat
home printer to print maps or real maps you can cut up
scissors
glue
heart shape stencil
picture to put in your frame

Okay.... So you take your favorite places on a map ( I used Google Maps) or you can use a real map and trace the location in the heart stencil and cut out.  Then you simply glue the hearts on the mat of the frame and your done!  Add as few or as many as you like.  I selected our special vacation spots, our first date, where we were married, our kids locations of birth etc.
I loved the way it turned out and so did he :)


Happy Crafting!

Monday, January 9, 2012

Betsy McCall Magnetic Paper Dolls

I was looking for games that I could make that would travel well without having the girls drop the pieces all over in the van.  After searching a bit I saw this site that had this tutorial.  http://www.tealandlime.com/2011/07/magnetic-paper-dolls/ I really enjoyed reading this so I went to work to try and make our very own. 

You will need the following = home printer, magnetic paper (found mine for $7.99 for 3, 8.5 x 11 sheets at Michaels) I used my weekly coupon and got it for 40% off, sharp small craft scissors, and a tin ( got mine at Michaels) I choose a plain one to decorate, and a medium sized rectangle one so I can add to their collection,  foam stickers or ribbon etc. to decorate your tin.

I started by going to http://tpettit.best.vwh.net/dolls/pd_scans/betsy_mccall/index.html to print my dolls.  I choose the earlier years since I liked the vintage look and the frilly dresses.  I took my magnetic paper and loaded it into the printer and printed my dolls. I had it work great, but I also know that it depends on your printer too.  If for some reason it doesn't work you can always take regular paper to print the dolls and glue them to the magnet paper. This will produce less waste too, but I took the shorter route. 
Cut your dolls out, put in your tin and decorate!
 This is the second set I have made.  The first set I gave as a gift to Doodle Bug's best friend and she loved it :) 
Enjoy