Thursday, September 13, 2012

Fall Wreath

I fell in love with white pumpkins for fall decor and I needed to make a wreath to reflect that love :) Okay, if you know me... You know,I LOVE a wreath! 

Here is the supplies you need =

Grapevine wreath (got mine at Hobby Lobby for $2.50) I used 40% off coupon
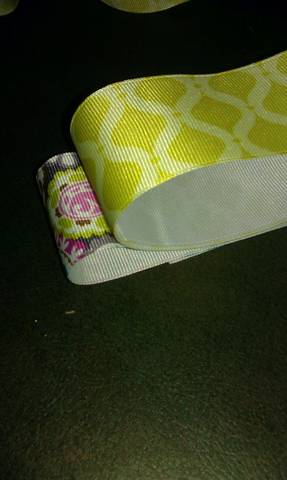
beaded wire ribbon ( free from another project)
2 spools of ribbon ( Hobby Lobby sale $4.00 for both)
6 foam white/buttercream color on a pick ( Hobby Lobby $1.50 each on sale)
6 brown pipecleaners ( $.97 at Hobby Lobby for a package of 25)
total cost = $16.47, now that's what I love!  These similar wreaths sell for $60.00 on up at stores

I used a beaded wire to weave into my wreath. You can use whatever decor you want, this is just an idea. Then you want to take your grapevine wreath and place your pumpkins on the wreath like a clock. One at 12, one at 2, one at 4, one at 6, one at 8, and one at 10. This will give you equal placement space between pumpkins.  I used ones that had picks that bent so I just weaved them through the back of the wreath.  No hot glue on this project :) YES!
The next step is to make the ribbons to put next to your pumpkins. I layed two on top of each other alternating between what color I put on top. I cut maybe 6 inches for the top color and 8 for the bottom color. I looped the two ribbons and stacked them on top of each other. I folded them in half and took a brown pipecleaner and pulled it as tight as possible and twisted the back. I took the finished loop ribbon and stuck both ends of the pipe cleaner through the wreath and weaved the extra pipecleaner into the back of the wreath. I placed the looped ribbons along side of each of the 6 pumpkins. 
 
 
It turned out so pretty. I love the colors I used for the ribbon. It has mustard yellows, and greens and purples and all the rich colors you see in the fall. I then took some remaining ribbon to do a loop to hang it from the front door.  I cheat and I don't use a wreath hanger for the door, I just take my end of the ribbon and tack it to the top of the door so there is nothing showing but the elegant ribbon. I hope you enjoyed this tutorial and I can't wait to hang this on the door for the fall season :)


Wednesday, September 12, 2012

Happy Fall!

Yep, I doubt I can call myself a "true blogger" as my last post was February!  Haha... Oh well, I try.  The McVay family has been through a whirlwind of change the last few months.  Aaron accepted an OnBase job at the begining of April that is based out of WI so we thought we were moving there but it turned out they had an office in Urbandale, IA so guess where we headed?? Yep!  We are now Iowans again!  Hooray! After a couple of straining months of craziness we are in Clive and loving it here.  Avary just started 2nd Grade and Sloan is in a pre-k program three days a week and they are both doing great.  Hudson just celebrated his very 1st Birthday and we were incredibly blessed to have shared it with great family and friends that we have missed terribly.  Hopefully I will be able to post more now that we are settled in.     Happy FALL!

Thursday, February 2, 2012

Chocolate Playdough

I am always looking for projects that our kids and I can do together.  I love the way a hands on actitivity can spark their little imaginations.  Here are the directions and receipe for Chocolate Playdough.... Play with it, don't eat it :) This is way cool ( in the words of Avary)....


INGREDIENTS:

1 1/4 cup flour
1/2 cup cocoa powder
1/2 cup salt
1/2 tablespoon cream of tartar
1 1/2 tablespoon cooking oil
1 cup boiling water


PREPARATION:

Stir ingredients together and mix well. Cook over low heat until dough forms a ball. When cool, mix with your hands.

Store in airtight container. It will smell good enough to eat but without sugar in it kids will not want to taste it a second time!

These are a few of our favorite things...

Aaron's birthday was January 11th, and I was trying to come up with something that was both meaningful and not just another "thing" for us to add to our stuff. I came up with this with a little help from another crafting blog, which now I can't seem to find.  So if this was your original idea, take credit where credit is due.  Here is my version. 

Supplies you will need:
frame with mat
home printer to print maps or real maps you can cut up
scissors
glue
heart shape stencil
picture to put in your frame

Okay.... So you take your favorite places on a map ( I used Google Maps) or you can use a real map and trace the location in the heart stencil and cut out.  Then you simply glue the hearts on the mat of the frame and your done!  Add as few or as many as you like.  I selected our special vacation spots, our first date, where we were married, our kids locations of birth etc.
I loved the way it turned out and so did he :)


Happy Crafting!

Monday, January 9, 2012

Betsy McCall Magnetic Paper Dolls

I was looking for games that I could make that would travel well without having the girls drop the pieces all over in the van.  After searching a bit I saw this site that had this tutorial.  http://www.tealandlime.com/2011/07/magnetic-paper-dolls/ I really enjoyed reading this so I went to work to try and make our very own. 

You will need the following = home printer, magnetic paper (found mine for $7.99 for 3, 8.5 x 11 sheets at Michaels) I used my weekly coupon and got it for 40% off, sharp small craft scissors, and a tin ( got mine at Michaels) I choose a plain one to decorate, and a medium sized rectangle one so I can add to their collection,  foam stickers or ribbon etc. to decorate your tin.

I started by going to http://tpettit.best.vwh.net/dolls/pd_scans/betsy_mccall/index.html to print my dolls.  I choose the earlier years since I liked the vintage look and the frilly dresses.  I took my magnetic paper and loaded it into the printer and printed my dolls. I had it work great, but I also know that it depends on your printer too.  If for some reason it doesn't work you can always take regular paper to print the dolls and glue them to the magnet paper. This will produce less waste too, but I took the shorter route. 
Cut your dolls out, put in your tin and decorate!
 This is the second set I have made.  The first set I gave as a gift to Doodle Bug's best friend and she loved it :) 
Enjoy

Monday, January 2, 2012

Rainbow Fun

This year Avary asked me if she could have a Unicorn party for her 7th Birthday.  Sloan chimed in and said Rainbow! Rainbow!  Sooo... I brainstormed and thought hmmm... Unicorn Rainbow :) With Avary and Sloan's Birthdays so close together I thought joint party!  I know, I know, they won't let me get away with that forever :) I thought it would be so fun to try a rainbow cake.  I shared the idea with Aaron and he said he would help me :)  Yep, we were up until midnight baking and frosting :) What we do for our kiddos... Enjoy! You will be delighted with the looks on their faces as you cut their cake for the first time!

Here are the things you will need
* your favorite white or yellow boxed cake mix (easy to color)
* food coloring for each layer of "rainbow"
  purple (red and blue)
  blue
  green
  yellow
  orange
  red
* pie tins or round cake pans
* 2 cans of white frosting

Directions,

Prepare your cake batter as directed on the box
divide your batter equally into 6 bowls
color each bowl of batter one of the 6 colors
bake in each color of  batter in a pie tin (which we did) or a round cake pan
bake at 350 degrees for 12-14 minutes depending on your oven and thickness of batter
let cool on baking rack
trim off domed top of each cooled cake so they stack nicely
start with a dab of frosting on a cake plate or cake cardboard
put your first layer purple on and frost a little on top, proceed with all the layers going from purple, blue, green, yellow, orange and red on top. (Which I would have done but my real life super hero husband didn't hand them to me in that order as I frosted) haha
 Frost entire cake in white.
I liked the white because when you cut it for the first time the layers and colors just POP! I did put a Skittle's Rainbow on top to decorate it and a small unicorn figurine and that turned out cute. Enjoy!


Avary Larie (7) Sloan Kamryn (4)

Thursday, December 29, 2011

Oh Holy Night

Wow! What a CHRISTmas.  We have so many things to be thankful for.  We have had an amazing 2011 and cannot wait to embark on 2012. Hudson had his first Christmas and it was just perfect.  We stayed at home in Virginia and enjoyed our time together as a family.  The girls loved to not rush around and run from place to place. We stayed in our jammies for a couple of days ( I mean hours) :)
 I hope to have some more time to blog on my DIY gifts I gave for Christmas after we get back from our Iowa Christmas in January, and Hudson's Baptism.We are so excited.

Peace, Love and Joy for an amazing New Year! God Bless