Tuesday, January 6, 2015

Valentine's Day Banner

I can't believe it has been an entire year since my last post.  I guess Facebook has gotten the best of me with my McVay's Nest page.  I just can't seem to find the time to blog.  That being said, I wanted to share with you a Valentine Banner that I made using supplies I had at home.  I know some of you might not have certain things you need at home.
 If you don't, the items I used in this project are very inexpensive.
Let's get started shall we?

Supplies you will need are:

Wide burlap ribbon
acrylic paint
ribbon or bias tape or twine
sewing machine or hot glue gun
freezer paper (grocery stores or Wal-Mart carry this by the plastic bag section)
iron
paint brush
scissors


 I started out with a very wide burlap ribbon that came in a roll from Hobby Lobby and I cut 7 square approximately 7 inches long.
I folded them in half and cut at an angle to form a dovetail point as you see on the right.  I wouldn't do all of the cutting at once, I would stack 2 at a time so your cut stays crisp.

I wanted my to read BE MINE, you can have your banner say whatever you choose.

I took my ribbon and left a good 6-8 inches of tail so I would have something to hang it from.  I then took my ribbon which was an 1 1/2 inches wide and pressed it in half so I would have something to sandwich my banner section in.
 I spaced the sections at 1 1/2 inches apart on the inside of the ribbon and pinned.  If you don't want to sew or you don't have a sewing machine, that's totally fine.  Just take twine or a ribbon and fold 1/2 inch of fabric down on your banner section over the twine or ribbon and hot glue them in between the fold.

I sandwiched mine in between the ribbon and used my sewing machine to tack them down with a straight stitch the length of the ribbon. I then cut the ribbon tails on dovetail points like I did with my banner sections by folding the ribbon in half and cutting at an angle.

I printed out BE MINE on my computer and traced the letters onto freezer paper using a basic font to mimic what a conversation heart font looks like.
I free handed my heart to space in between the two words BE MINE, but you can print a heart one if you choose to trace one out.
 I could have made the letters a bit bigger, but no big deal :)
I took my scissors and cut out the inside of the letters to form a stencil, you could use and exacto knife also if you have one.
The letter B will have two segments you will have to keep track of before you iron them to the banner section to for the bumps in the B
 Iron each freezer paper letter onto the banner section one letter at a time, making sure they are roughly the same space on each section.  I didn't measure or anything, just eyeball it!

The letters are all ironed on and the next step is to take your paint and go over your make shift stencils you've just created.  
I need to get a Silhouette Portrait that's for sure! It would make my life a little easier but I honestly enjoy the stress relief that crafting provides me.  It's free therapy!
Make sure you are being careful not to go off of your freezer paper with the paint.
 I peel the freezer paper away immediately to avoid any bleed through. The beauty of the freezer paper is it bonds without leaving any residue behind and sticks to a lot of different items when ironed on.


I had to grab this wooden block at a local department store.  The song is so beautiful and the hubby and I love it!

Here is my finished banner all hung up on the mantle.
  I used gold metallic paint for the heart and love how it turned out.  
I hope you give this a try! Maybe just hearts all the way across would be adorable too, and less cutting.
It is something you can use for years to come.

Happy Valentine's Day,

Kadi 
McVay's Nest

Friday, February 7, 2014

Beat those winter blues! Indoor tulip garden...

I had to get something green in our house.  After months of snow and cold I just craved it.  The warmth it gives you, as you look at a plant growing in your home when you look outside and see a mound of the "white stuff".
Something about it just makes you a little happy.  It does, don't deny it! :)

Here is what you will need for your winter garden :

bulbs ( mine are tulip- left over from last year)
Glass vases ( you can find these at Goodwill or I bought mine at the Dollar Tree)
Glass marbles or rocks ( Dollar Tree) 3 bags
water

Start off by rinsing off your rocks or marbles.  The shelves at the stores are dusty and lets face it, gross!

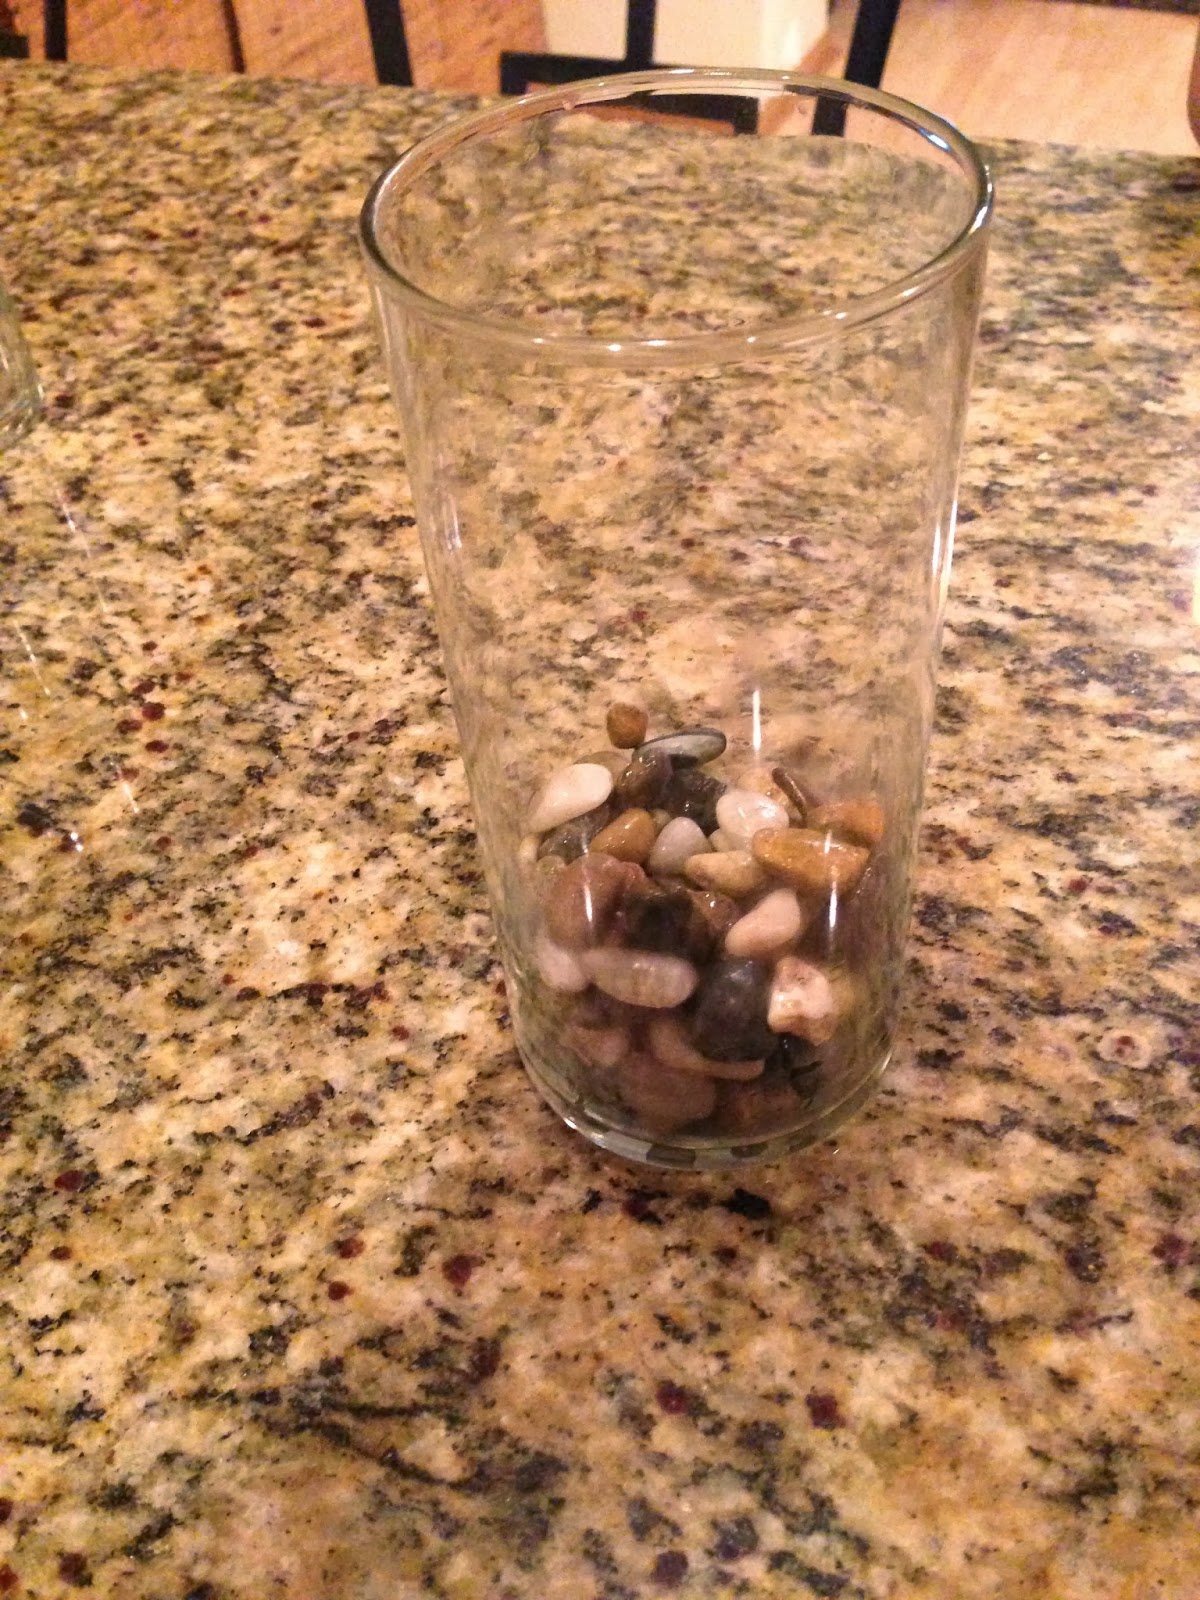
Go ahead and put a 1/4 of the rocks into the bottom of the glass vase
Then put the bulbs with the pointed side up into the jar. I put maybe 6 or 7 bulbs into the vase
Add a little water to the vase just making sure the water barely touches the roots of the bulbs
This is the view looking into the vase, I put the bulbs touching each other so they would have some support as the grew
I can't wait to see them sprout and grow!  Make sure you check the water level every couple of days so the bulbs stay hydrated 

Two weeks later and they look so pretty already!

From my nest to yours, enjoy!

Kadi

Monday, November 11, 2013

EAT { Kitchen Decor }


Our kitchen was lacking a little something "shiny" or "blingy" or "sparkly".

And those of you who know me, know I love those things so this is a really cheap and quick project to spruce up your kitchen space.

You can spell out any word you like, switch it up for the bathroom and say "BATH", etc. You get the idea...


You could even do something in nickels to do silver, which I absolutely love but I wanted to do something I don't normally go for in color so I chose the copper for the pennies ( that and it's cheaper)... literally! haha


Here is what you will need


Paper Mache letters (got mine at HL for $1.49 each)


Acrylic Craft Paint in copper color (I thought I would add some silver for dimension, but didn't end up needing it) on sale at HL for $.89


Saw tooth hangers that have the points to push into the back of the letters ( HL see the package for the price, super cheap!)


Paint brushes, or foam brush


Pennies, lots of them... I used our change jar and then had to go to the bank and get a couple of rolls :)


E6000 glue in clear ( you can use a glue gun, but you will burn the crap out of your fingers... so don't!) you can find this at Wal-Mart now and it runs anywhere between $2.99 to $3.99 depending on the size of the tube and the area you live in.

Your craft store will have this too. I recommend this glue because of the strong bond it creates. It is a bit smelly so use a good ventilated area :)


Let's do this thing!


Take your letters and paint them front and back, letting them dry on each side in between

After the letters have dried take the pennies and glue them on row by row. I did some heads up, some down, some were shiny and new and others were old and patina.
I did three rows, one at a time and overlapped the middle row after the first side by side rows were done. Let each row dry in between.


Once the rows are completed, let them dry overnight.


Take the saw tooth hanger and push it through the back of the letter by hand with a little bit of force.

Hang them on your wall how you would like them to be displayed and enjoy! They are so pretty when the light reflects off them.


Feel free to pin!
Thanks for stopping by my blog
I hope you enjoy my projects as much as I enjoy making them!

Kadi

Wednesday, October 23, 2013

"Sorry Out of Candy" Halloween Sign for those little beggars on Halloween night

We ran out of candy last year, and the year before, and well... I can't honestly think of a year that we haven't!

  I accepted the fact that I wasn't going to buy $50 of candy for our trick or treat night so I came up with this sign.

Here are the supplies you will need:

scrap wood or ( I bought a craft board at HL for $1.99)

acrylic paint ( had on hand)

paint brushes ( on hand )

1/4 dauber foam circle stencil brush and a large dauber ( you can find these next to the stencil section of your craft store)

print out of the saying you want to use, I originally had , Out of Candy... ( I changed it to mind my manners...... Sorry, Out of Candy) like the sorry really matters when your telling people you don't have candy???? haha!!

pencil

assorted ribbon

drill and bit

poly spray paint to seal it all off when you are done painting it

This is the 1/4 inch Dauber and the other "foam dauber" I am not sure the size on. I love these because they make great perfect circles for polka dots.
 
 
I painted my sign base green
 
 
Once that dried ( front and back) I painted the polka dots with the foam dots in purple and orange
 
No science to this, just random placement, have fun with it :)
 
Once that has dried completely, take your pencil and your saying that you have printed out. 
 
 Turn it to the back side of the print out ( where the letters are not printed) , and rub your pencil along where your letters are on the front of the paper. ( You are creating a transfer or carbon type paper) . 
 
 Make sure you have gotten the entire saying covered on the back side.
Center the print out ( printed side facing you up) onto your dried sign and tape the corners onto the sign
 
Take your pencil and outline each letter of the saying carefully not to poke through the paper completely.  You can lift up the bottom two pieces of tape to check your work to make sure the letters are "transferring" ok.
This is a great technique that allows you to use any font imaginable online for any project you can think of. 
 I am planning on making this "transfer" technique to really good use for Christmas. ( Yes!  I said it..... Christmas!!!) it is sneaking up on us people!!!  Get your Craft-on!!
 
Once you have traced around all of your letters remove the paper printout, and paint the letters in carefully using the smallest brush known to man kind.. haha..
 
 
Spray the poly on for all weather protection and years of useabilitly ( I made up a new word!)
 
Drill one hole in each corner to hang the ribbon through and decorate with additional ribbon!
 
Check out this sweet thing!
 
Our doorbell better stop ringing once this sign goes out!  haha...
 
Last year it was past 9pm our light was out, and that didn't seem to matter :)  This sign means SERIOUS business!  ;) ( Yeah right)
 
Hope you all have a safe and fabulous Halloween!!


Wednesday, September 25, 2013

Chevron burlap wreath

Okay I must confess... I'm a chevron addict. I don't know how or when this happened,  all I know is that it has taken over my house.......fabric, picture frames, pillows...( I need to stop!)

   I love the look of burlap wreaths but the original color was just a little to "prim" for my style so I spiced it up a little when I saw this printed burlap in rolls.


 Hobby Lobby has several prints and now that they offer online shopping with their coupon codes, anyone can take advantage of their great pricing.
And let's face it..... I love this Christian based company and the values they have.

Here is what you will need=

Metal wreath form (mine was a 22 inch ) $ 3.49, you can go smaller if you want

3 rolls of 5/8 inch burlap if your choice ($4.99 roll, it was 50% off) score!! If you have a smaller wreath frame or larger buy accordingly

Wooden letter of your choice, $1.99

Spray paint, free in my stash


First I would go outside and take your letter, spray paint a light coat of paint and come back inside to relieve yourself of the fumes.

 I have been doing a little too much spray painting lately... whew!!

The second step is to take the roll of burlap and gather a bit in your fingers and push some through the other side of the wreath.  Take roughly the same amount and repeat, staggering as you go.


I like to bunch it to the left push through, bunch it to the right, push through... gathering roughly the same amount in your hand each time.

 Keep going...... and going.... you get the idea...

This is what one roll looked like completed. To start the new roll just repeat the beginning of the process.  There really is no wrong way to do this :) Well maybe I'm doing it the wrong way, but I like to live on the wild side...
Now that your living on the edge, go give your letter another coat of paint...

Ta-da!!! All 3 roll on this baby....

 Added my letter M, don't mind the faded burgundy door, this has a new face lift now to a rockin' gray!


Pay no attention to the baby behind the glass!! ( he was mad I stepped outside to snap this picture) lol

Enjoy this wreath!  I love the way it turned out and I think it is a great project for anyone wanting to give wreath making a try.
 Besides these sell on etsy for an upwards of $80 so forget that business (unless that's your business) :)
  I made mine for under $25!


Kadi


Friday, August 23, 2013

Dollar Tree Fall letter fun

I wanted to post a really quick project I did in record time... ( like 5 minutes) seriously... CUTE!

Dollar Tree had these cute little pumpkin magnets that I thought would be adorable for Hudson to play with on our entry way door.

 I thought I would add his name on them for a little letter recognition fun. I realize he is not quite 2 but I think starting early never hurts :)

I think my local DT just started to put out our fall stuff so check yours soon if you don't see them quite yet.

 
They are about 3 inches tall and maybe 2 inches wide, the picture makes them look really small but they are super cute!
 
Then I just took a black Sharpie and wrote his name on each letter.  I tore one by accident so I pitched it, you might have to purchase more than one package depending on the length of your child's name.  You could have a lot of fun with these and write the alphabet, numbers, etc.  Older kids could even build up sight words!
 
 
*Here is a little tip too- I didn't like the way I wrote my U so I took some Isopropyl Alcohol and a cotton pad and wiped off the Sharpie and it came right off for me to start again!  Pretty sweet!!  All the more reason I "need" a vinyl cutting machine :) LOL
 
Have fun!!


Monday, August 12, 2013

My very un-wreath door wreath

So I was surfing Pinterest and I liked this post that showed a burlap fabric stretched in a embroidery loom and then a letter painted on the inside and I thought I would like to switch mine up a bit ( that and I can't leave anything alone).

 I like the look of the burlap one too, so I may still try this for my Fall door.  Here is the post for that if you would like to take a look http://lifeasathrifter.blogspot.com/2012/09/favorite-fall-decor-from-past.html?m=1

Here is my version :)

Supplies you will need

*Large Embroidery Loom or Hoop ( I don't know the technical term) haha! I got mine for $8.99 with 50% off at Hancock Fabric

*white or cream neutral canvas fabric or heavy duck cotton cloth (had mine at home in my stash) leftover Ikea curtains!

* any fun colored fabric for your letter , a scrap will do

* Heat and Bond- this is a paper type product for those who have not used it, comes in a package or by the yard
 ( found even at Walmart $2.99 pkg) or even cheaper by the yard at JoAnn or Hancock

* Iron

*Ironing Board

*Scissors

*printer, computer, and paper to print your large letter onto ( I just Googled the letter M and it came up with a ton of free images and I picked my favorite and printed it in an 8x10)


Now that you have your supplies, let's do this thing!!

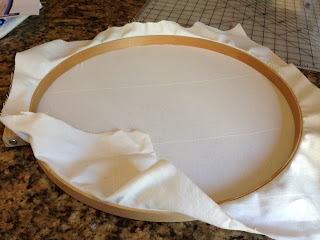
Take your cream colored fabric and stretch it across your hoop and pull tight, put the other hoop over top and tighten the top of the hoop to stretch the fabric across.
Once it is tight and smooth across the top, go ahead and cut off the extra fabric hanging off the sides.


The finished top will look like this baby!

Go ahead and Google search your letter and print it out in the 8x10.  Since my letter was an M, I didn't need to trace mine in reverse onto the Heat and Bond paper.

 If you have a letter that needs to be reversed just turn your print out over and trace it in the mirror image so that when you go to iron your fabric letter on, your letter won't be backwards.

If you have never used Heat and Bond paper it is an applique paper that you will trace onto the paper side and then on the rough tacky side you will iron onto the WRONG side of your fabric.

Let me repeat... iron onto the WRONG side of your fabric ( the side without the print ) there have been many coffee deprived days where I have gone to iron an applique and I have ironed the right side of the fabric and it will ruin EVERYTHING!!

And you will have to start over :) So... grab your coffee, chug it like a champ, and iron the WRONG side of the fabric:)


Trace your letter to the Heat and Bond

Iron onto the WRONG SIDE of your fabric ( the side without print) I use the cotton setting on my iron (check the Heat and Bond directions)
Cut out your letter, and remove the paper backing and center into the cream hoop and iron onto the fabric


 So simple, so pretty, and so EASY!!  From my nest to yours, enjoy!
 
Kadi