So I was surfing Pinterest and I liked this post that showed a burlap fabric stretched in a embroidery loom and then a letter painted on the inside and I thought I would like to switch mine up a bit ( that and I can't leave anything alone).
I like the look of the burlap one too, so I may still try this for my Fall door. Here is the post for that if you would like to take a look
http://lifeasathrifter.blogspot.com/2012/09/favorite-fall-decor-from-past.html?m=1
Here is my version :)
Supplies you will need
*Large Embroidery Loom or Hoop ( I don't know the technical term) haha! I got mine for $8.99 with 50% off at Hancock Fabric
*white or cream neutral canvas fabric or heavy duck cotton cloth (had mine at home in my stash) leftover Ikea curtains!
* any fun colored fabric for your letter , a scrap will do
* Heat and Bond- this is a paper type product for those who have not used it, comes in a package or by the yard
( found even at Walmart $2.99 pkg) or even cheaper by the yard at JoAnn or Hancock
* Iron
*Ironing Board
*Scissors
*printer, computer, and paper to print your large letter onto ( I just Googled the letter M and it came up with a ton of free images and I picked my favorite and printed it in an 8x10)
Now that you have your supplies, let's do this thing!!
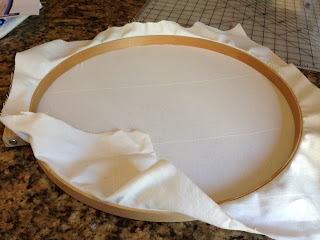
Take your cream colored fabric and stretch it across your hoop and pull tight, put the other hoop over top and tighten the top of the hoop to stretch the fabric across.
Once it is tight and smooth across the top, go ahead and cut off the extra fabric hanging off the sides.
The finished top will look like this baby!
Go ahead and Google search your letter and print it out in the 8x10. Since my letter was an M, I didn't need to trace mine in reverse onto the Heat and Bond paper.
If you have a letter that needs to be reversed just turn your print out over and trace it in the mirror image so that when you go to iron your fabric letter on, your letter won't be backwards.
If you have never used Heat and Bond paper it is an applique paper that you will trace onto the paper side and then on the rough tacky side you will iron onto the WRONG side of your fabric.
Let me repeat... iron onto the WRONG side of your fabric ( the side without the print ) there have been many coffee deprived days where I have gone to iron an applique and I have ironed the right side of the fabric and it will ruin EVERYTHING!!
And you will have to start over :) So... grab your coffee, chug it like a champ, and iron the WRONG side of the fabric:)
Trace your letter to the Heat and Bond
Iron onto the WRONG SIDE of your fabric ( the side without print) I use the cotton setting on my iron (check the Heat and Bond directions)
Cut out your letter, and remove the paper backing and center into the cream hoop and iron onto the fabric
So simple, so pretty, and so EASY!! From my nest to yours, enjoy!
Kadi


